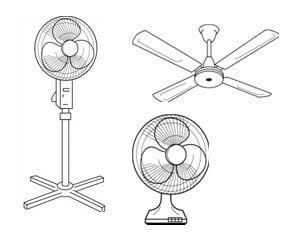
How to Clean A Window Fan and keep it Working Like New
Window fans become dirty very frequently because they drag outside air as they usually place in the window. And the dust particles in the air make this fan grimy.
So if you have a window fan in your home, you must need to know how to clean window fan most efficiently.
There are many window fan models available. Some models are easy to disassemble and some don’t. Window fans that are easy to disassemble can be cleaned easily and quickly.
Why You Need To Clean A Window Fan Regularly
- Regular cleaning of window fan will keep it working like new.
- It is very important to clean your window fans frequently to stop unwanted build-up like pollen and mold spores.
- Inhaling mold spores and pollen can cause serious health problems especially those who are affected by asthma or allergies.
- It is very hard to clean a window fan that is not cleaned for years. You notice a dramatical decrease in your window fan performance as dirt and debris build up in the fan can affect the motor.
Things You May Need While Cleaning A Window Fan
Cleaning your window fan is hassle-free and you only need household items that most people already have. No need to go out and spend your hard earned money on cleaning supplies or cleaning agents. You will simply need a vacuum cleaner, mild soap, and a soft, non-abrasive cloth.
Instructions Need To Follow To Clean Window Fan
Here are some step by step instructions to effectively clean your window fan and keep it working like new.
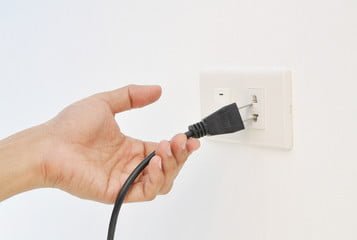
Step 1: Getting Started and Unplug the Cord
 After arranging all the necessary equipment that we mentioned earlier you are ready to clean it.
After that unplug the fan power cord and remove the fan unit from the window. Place the window fan in an open space after unplugging.
You should bear in mind that it is very risky and could be life threating if you start cleaning a window fan without unplugging the power cord.
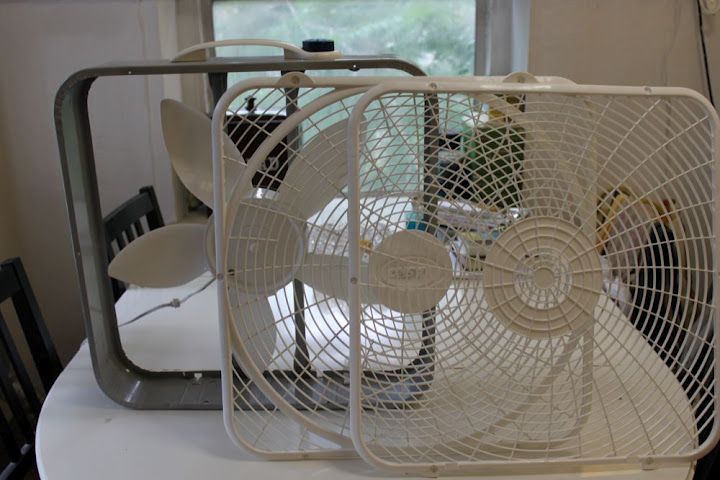
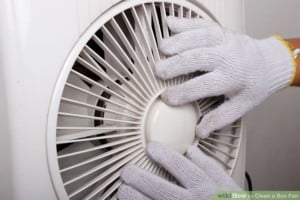
Step 2: Removing the grill
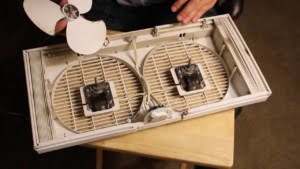 Some window fan models come up with a grill that is safely attached with screw; In that case, you have to unscrew the fan using the Phillips screwdriver.
Some newer models make it easier and the grill is held in place by a release button. Only you have to press the release button and carefully maneuver it until the grill is out of the fan.
Step 3: Cleaning the grill
 You have detached the grill from its body. Next, you have to do is clean it properly. You can follow two methods to clean a window fan grill.
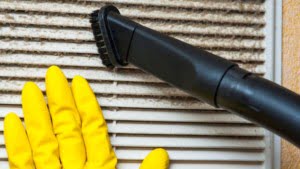
Method 1: This method is very easy and quick. To clean the grill using this method, you just need a vacuum cleaner that comes with narrow hose with attachment. The attachment ensures maximum dust suction from the grill. You can use a vacuum cleaner with hose but it may not clean grill completely.
After taking a vacuum cleaner, simply vacuum up all of the dust on the grill.
Method 2: Though this method takes more time, it is the most effective way to can window fan grill. The first method can’t clean it completely. Let discuss the method in dept.
First, you have to make a mild solution. You can use cleaner like soap or detergent to make it. After that, take a non-abrasive cloth and dip it in the solution and clean the grill with the cloth.
Sometimes dust is caked on the grill and it becomes very hard to wipe it with a cloth. It that time you need to do some extra work. You need to submerge your grill in warm water for a few minutes and after that, you can easily wipe it with a cloth.
After cleaning the grill, lay down it on a dry towel.
Step 4: Cleaning the Fan Blades
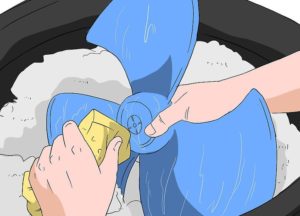 Cleaning the fan blades are quick and easy. Simply use your non-abrasive cloth dipped in a light soap or detergent solution to clean the dust and dirt off of the fan blades.
If your blades are fixed not removable then you can’t dip the blade in the solution. You have to clean it keeping it in the place where it is. Take a cloth, dip it in the solution that we discussed earlier and then wipe it properly. Always be cautious not to allow water to seep through to the inner assembly and motor.
If the dust build-up in blades become hard, you have to submerge the fan blades in warm water for a few minutes before start cleaning.
Step 5: Putting it back together
 Once you have cleaned your grill and fan blades you need to let them air dry on a towel. You could also set them in the sun to dry out. This usually takes anywhere between 5-20 minutes depending on which method of drying you use. Always be sure that your grill and fan blades are completely dry before putting them back onto your window fan unit. Assemble the grill back in the place and check it again that it put back securely. Wait for few hours to fan become dry. After a while, plug the power cord. Turn on the fan again.
Helpful Tips and Safety Precautions
- Always be sure that your window fan is turned off and is unplugged before cleaning.
- Keep your window fan clean on a regular basis to optimize airflow and keep pesky pollen and mold spores out of your home.
- When there is a lot of build-up on the grill and fan blades allow them to soak prior to cleaning to loosen the dust and dirt.
- Allow your fan blades and grill to dry completely before reassembling your unit.
- When you are not using your window fan for long periods of time, clean it before storing it, and cover it in a plastic trash bag.
Cleaning your window fan with the simple steps provided will keep your window fan working like new! The complete cleaning process may take 20-30 min only. So why are you waiting! Get your supplies ready and start cleaning your window fan today!
Reference:
https://www.wikihow.com/Clean-a-Box-Fan
https://www.doityourself.com/stry/how-to-clean-your-window-fans